Upgrade Your Garage: Transforming Floors with Coatings

May 7, 2024

Garage floors endure a lot—heavy loads, friction, dropped tools, and chemical spills. Over time, this wear and tear leads to cracks, pits, and surface deterioration. If these early signs of damage are ignored, they can progress and eventually compromise the entire floor. Moisture, vehicle oils, and chemicals may seep into the surface, making the floor not only unsightly but also unsafe and unusable.


One of the best ways to prevent or repair this damage is by upgrading your garage floor with a high-quality floor coating. This approach is both effective and cost-efficient—and even suitable for DIY enthusiasts.


In this article, we offer a step-by-step guide for coating your garage floor and provide tips to maximize the durability of your new finish.

Benefits of Upgrading Your Garage Floors with Coatings

Here’s why floor coatings are an excellent investment for your garage:


  • Protects the underlying concrete from wear and tear
  • Prevents staining from oil, gasoline, and chemical spills
  • Reduces the risk of slips and falls
  • Enhances aesthetics with decorative finish options
  • Makes the surface easier to clean and maintain
  • Saves money in the long run by preventing future damage


Step-By-Step Guide to Garage Floor Coatings


When planning a home concrete upgrade, it’s smart to consult local experts. PolyMagic proudly serves the Kansas City area and can help with your garage, basement, pool deck, or patio coating project.


STEP 1: CHOOSE THE RIGHT COATING

Two types of coatings are especially suited for garage floors: polyaspartic and epoxy. Here’s a comparison to help you decide:

Pros Cons Application Criteria
Easy-to-apply, quick dry, faster curing Expensive If the garage floor becomes wet often
Highly durable Acid corrosion If the garage falls into high-traffic criteria
Resistant to chemical and moisture Less decorative options If the garage is in a very hot area
Eco-friendly Critically controlled temperature is required in the installation process

Epoxy Floor Coating

Pros Cons Application Criteria
Comparatively cheap Becomes yellow over time Garage serves commercial purposes
Moderately flexible to temperature when installing Slippery surface if the floor gets wet Budget is a core concern
Long service life Slow curing Greater durability is prioritized
Highly DIY-friendly Can host scratches easily

STEP 2: PREP THE GARAGE FLOOR

Proper preparation is critical—over 70% of coating failures are due to poor surface prep.

  • Start by removing contaminants like oil or grease using heavy-duty soap and water.
  • Seal cracks, pores, and voids (as recommended by the American Concrete Institute).
  • Use a shot blasting machine to remove debris and improve adhesion.
  • If you don’t have access to a shot blaster, use trisodium phosphate and a stiff-bristle brush as an alternative.


Professionals also perform moisture and temperature tests to ensure the surface is ready for coating. DIYers can skip this step, but it helps ensure long-lasting results.


STEP 3: APPLY THE BASE COAT

Once the surface is clean and dry, it's time to apply the base coat:

  • Begin only if the temperature is between 50–70°F.
  • Mix your coating according to manufacturer instructions. For example, an epoxy mix typically uses a 2:1 ratio (Part A to Part B).
  • Use a high-quality roller to apply the mixture evenly.
  • Target coating thickness: 8–25 mils


STEP 4: ALLOW FOR CURING

After the base coat is applied, let it cure for 24–72 hours. Do not walk or drive on the surface during this time.


STEP 5: APPLY THE TOP COAT (OPTIONAL BUT RECOMMENDED)

If budget is tight, you may skip the top coat and instead apply a thicker base coat. However, for optimal results, adding a top coat is highly recommended. It provides:

  • Greater durability
  • Improved resistance to stains and chemicals
  • Better UV protection
  • A smoother, glossier finish


The application and curing process is the same as with the base coat. For best results, apply it in small, manageable sections.


STEP 6: FINISHING TOUCHES

After the top coat cures:

  • Use 120-grit sandpaper to smooth the surface.
  • Touch up any missed areas.
  • Use a pin to pop any air bubbles that formed during coating.
  • Mark a chalk line around the perimeter for a crisp, professional finish.


Maintenance Tips for Garage Floor Coatings


To extend the life of your new garage floor coating, follow these maintenance best practices:

  • Sweep and mop regularly using mild, non-abrasive cleaners.
  • Avoid dragging sharp objects across the floor.
  • Address cracks or scratches promptly to prevent deeper damage.
  • Use doormats at garage entrances to minimize dirt and debris.
  • Call a professional if you notice significant peeling, cracking, or other surface failures.


Floor Coatings Add Value Immediately


Upgrading your garage floor with a quality coating offers both functional and visual benefits. From protecting the concrete to enhancing your home's curb appeal, the advantages are clear. Follow the maintenance tips above to ensure the coating lasts for years to come.


If you're ready to take the next step, contact PolyMagic today. We’re proud to serve Kansas City homeowners with expert guidance and high-performance floor coating solutions.

June 9, 2026
Discover 10 reasons Missouri homeowners choose epoxy garage floors. PolyMagic serves Kansas City, Columbia, Jefferson City & Lake of the Ozarks. Free estimate!
concrete pool deck coating
May 20, 2026
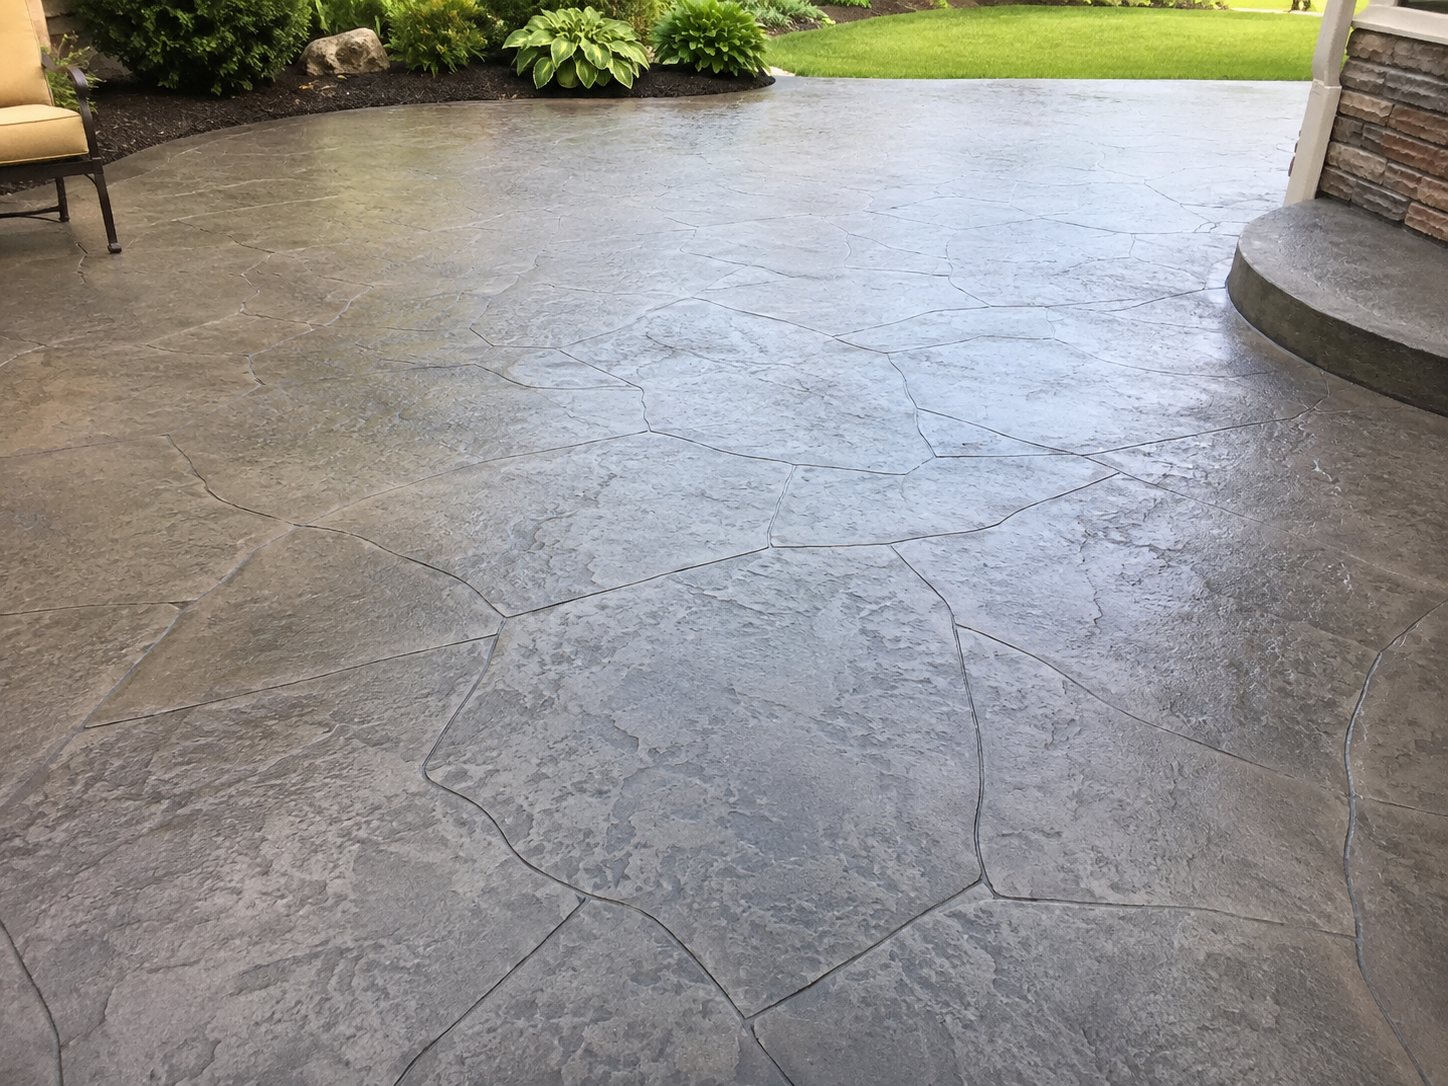
Transform worn concrete without replacement. PolyMagic offers decorative concrete overlays for pool decks, patios & commercial spaces in Johnson County, KS.
By PolyMagic March 6, 2026
Spring is the best time for concrete leveling near me in Kansas City or Mid-Missouri. PolyMagic lifts sinking driveways, patios and sidewalks fast. No replacement needed.
PolyMagic service truck with hoses spraying material on a driveway outdoors
By PolyMagic December 15, 2025
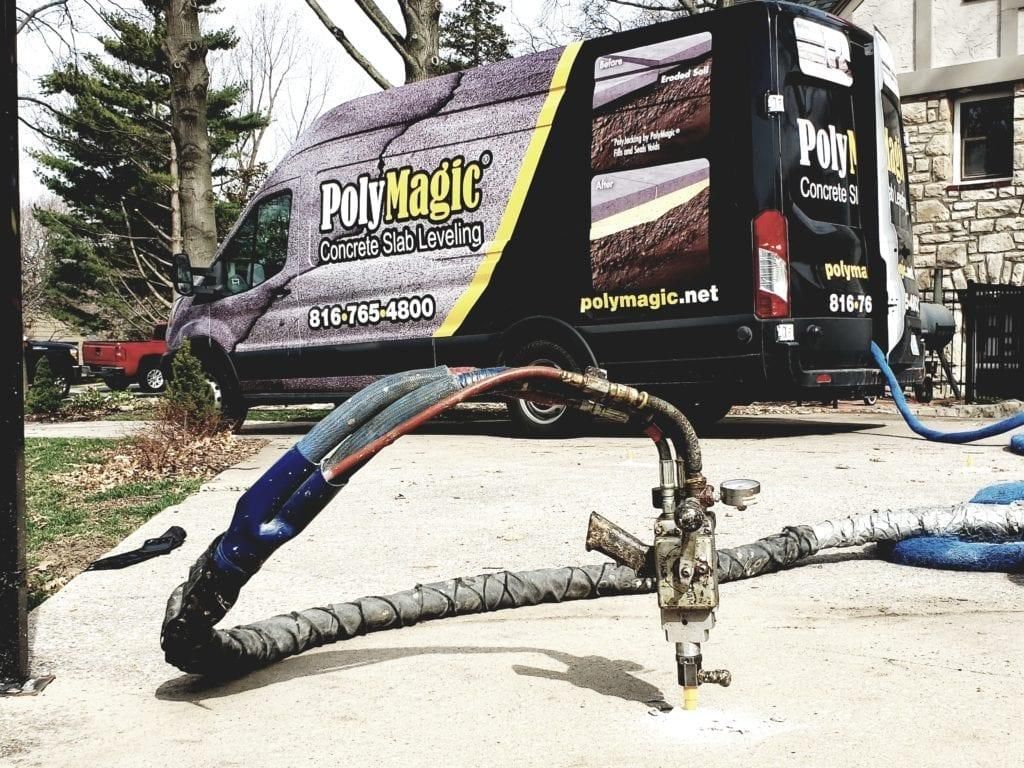
Polyjacking repairs last indefinitely with stable soil. See how polyurethane foam outlasts mudjacking in Missouri's clay soils. Free estimates from PolyMagic.
Classic white convertible and dark vintage car parked in a polished showroom
By PolyMagic PierMagic December 11, 2025
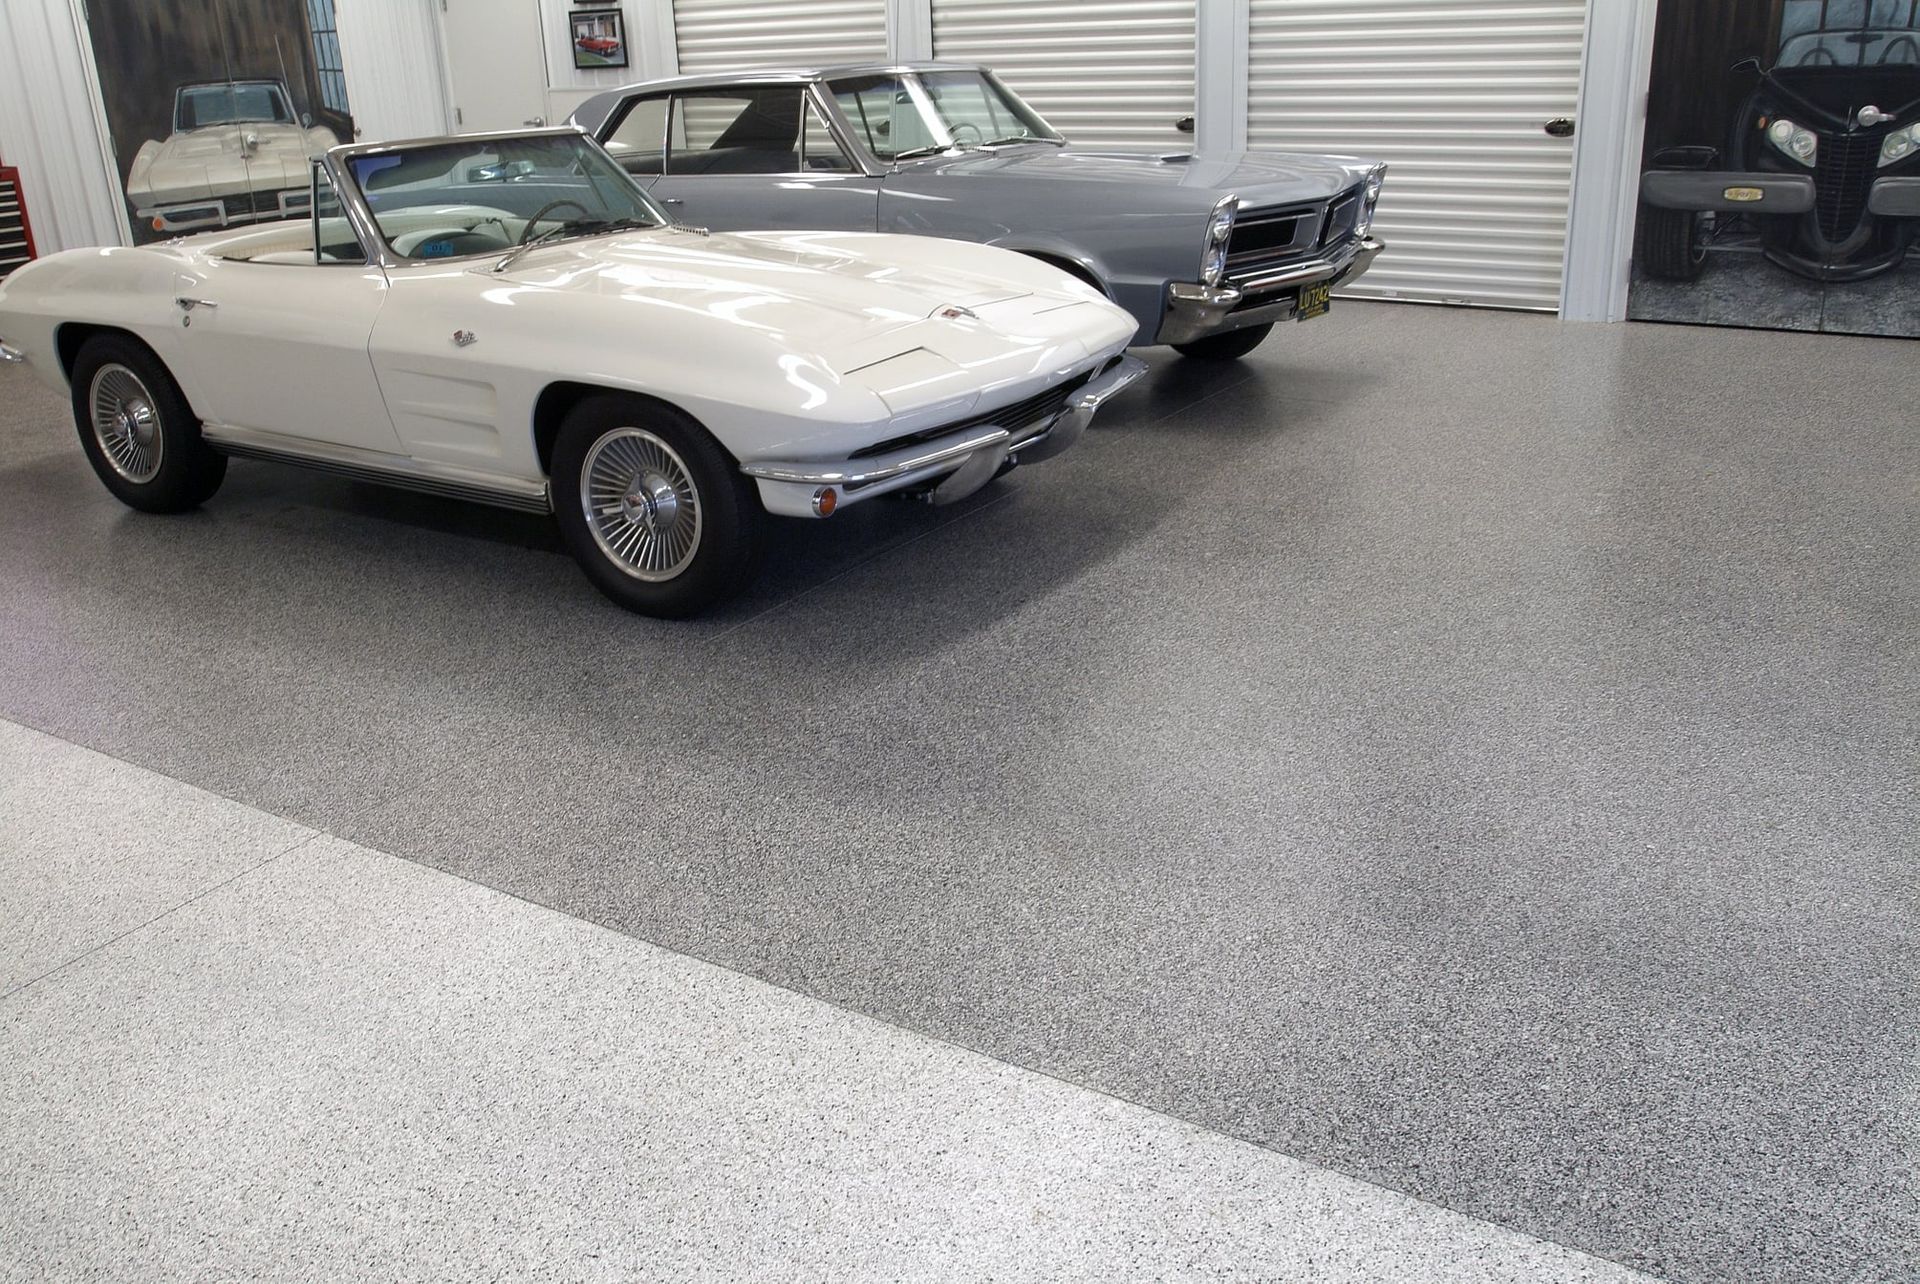
Professional epoxy garage floors repel oil, road salt & spills permanently. PolyMagic serves Kansas City, Jefferson City, Columbia & Lake of the Ozarks. Free quote!
Empty unfinished basement with gray floor, exposed ceiling beams, and sliding glass door to backyard.
December 3, 2025
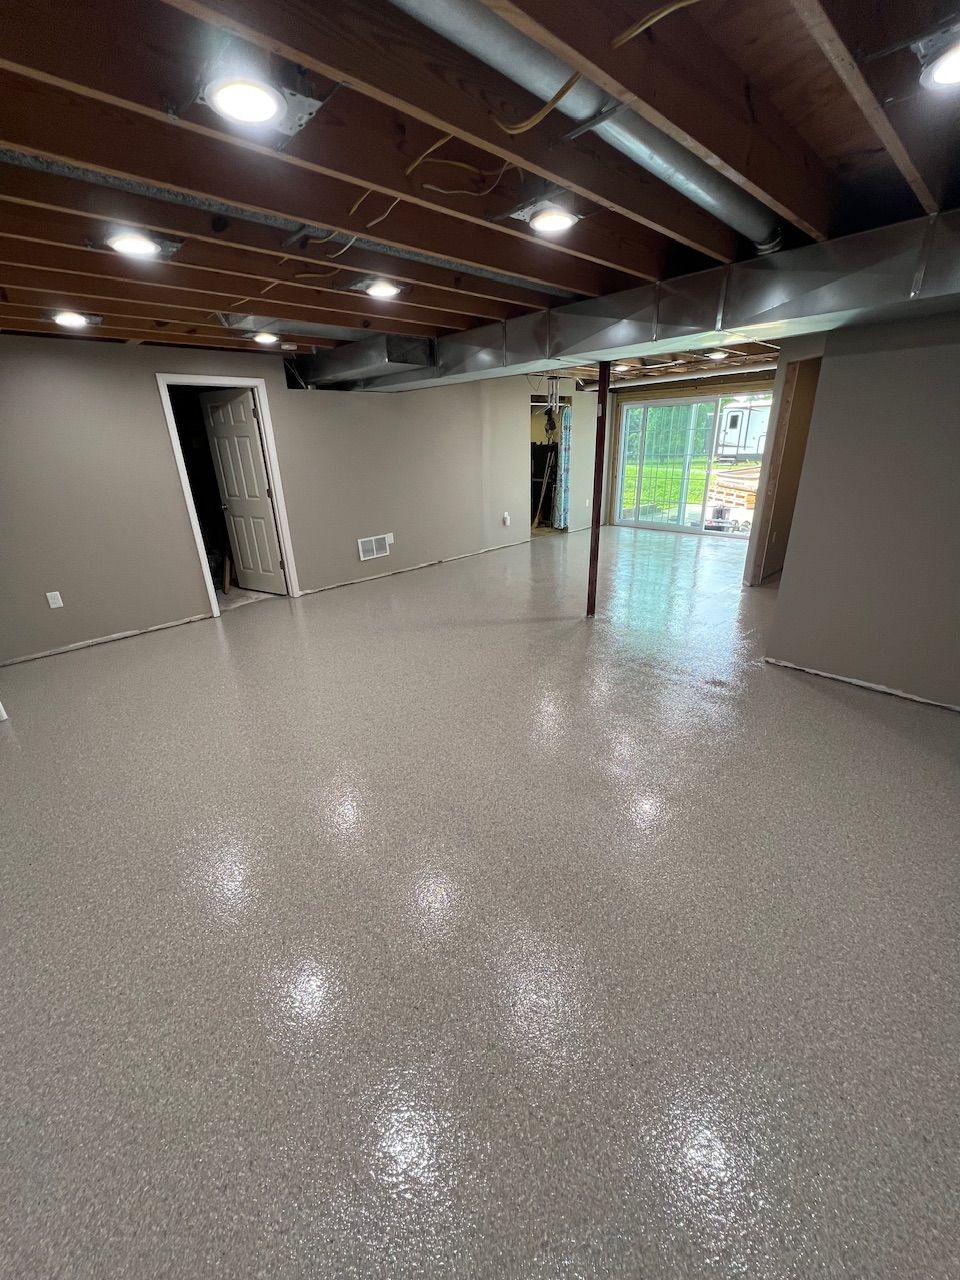
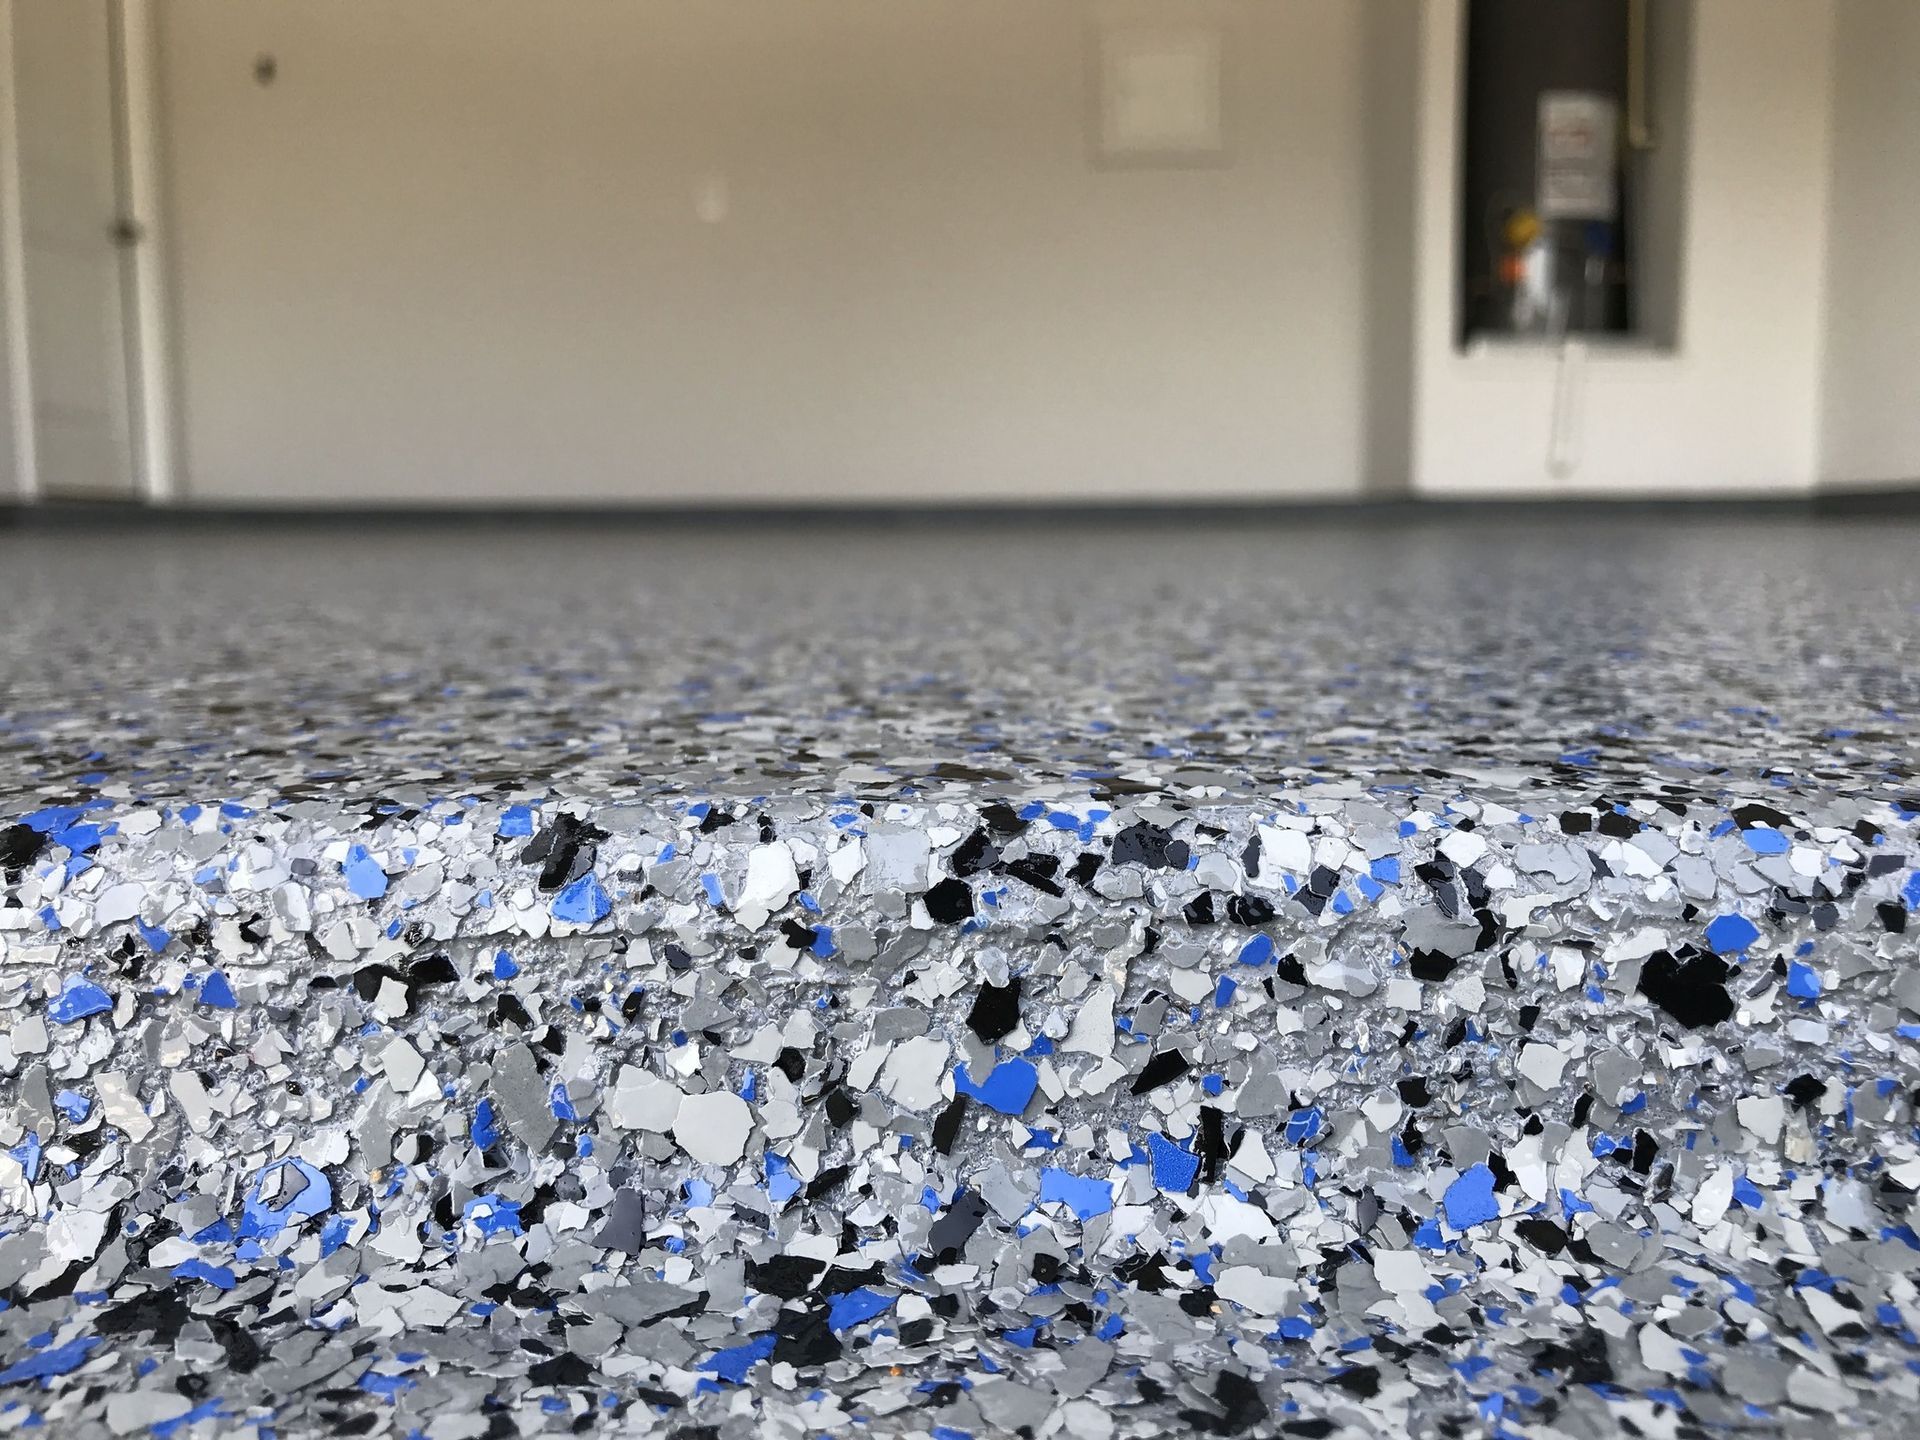
Epoxy isn't just for crafts—it's serious floor protection. PolyMagic installs professional epoxy coatings in Kansas City, Jefferson City, Columbia & the Ozarks.
Snowy suburban sidewalk with orange snow markers, plowed path, and houses under a clear blue sky
By PolyMagic PierMagic December 3, 2025
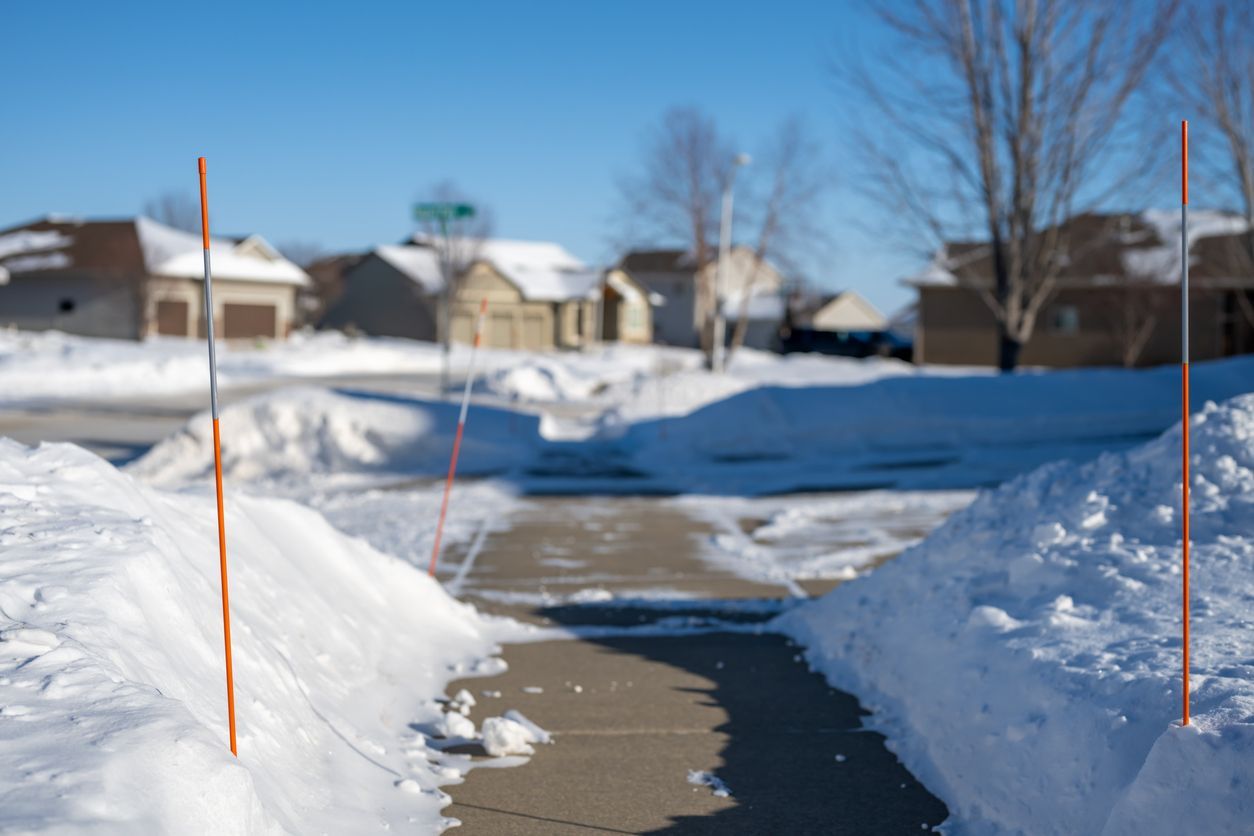
Winter freeze-thaw cycles can crack & damage concrete fast. PolyMagic protects Kansas City, Columbia, Jefferson City & Lake of the Ozarks concrete. Free assessment!
Durável Authorized Dealer logo in black and green text on white background
By PolyMagic PierMagic December 3, 2025
Restore and protect your stamped concrete with Duravel coatings and overlays. PolyMagic serves Kansas City, Columbia, Jefferson City & Lake of the Ozarks.
Concrete garage floor with a long gray textured strip running from the foreground to the back wall.
By PolyMagic PierMagic December 3, 2025
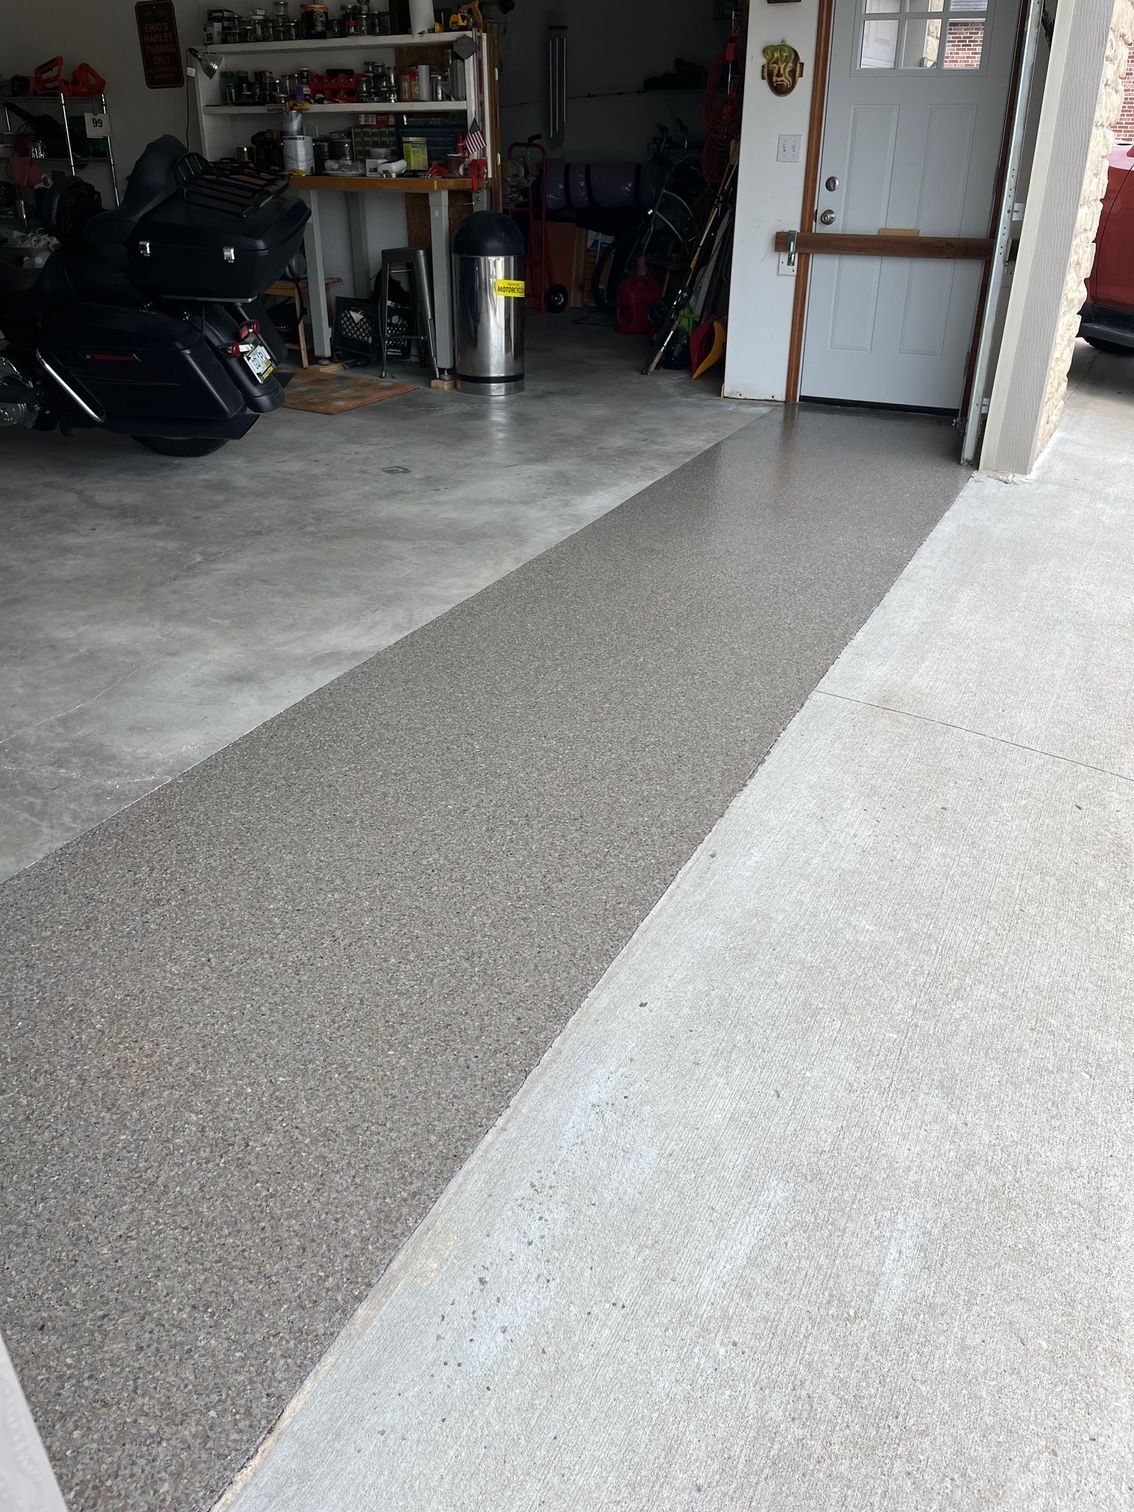
Epoxy coatings protect concrete floors for 15–25 years. PolyMagic delivers professional epoxy installation in Kansas City, Jefferson City, Columbia & the Ozarks.
By PolyMagic PierMagic December 3, 2025
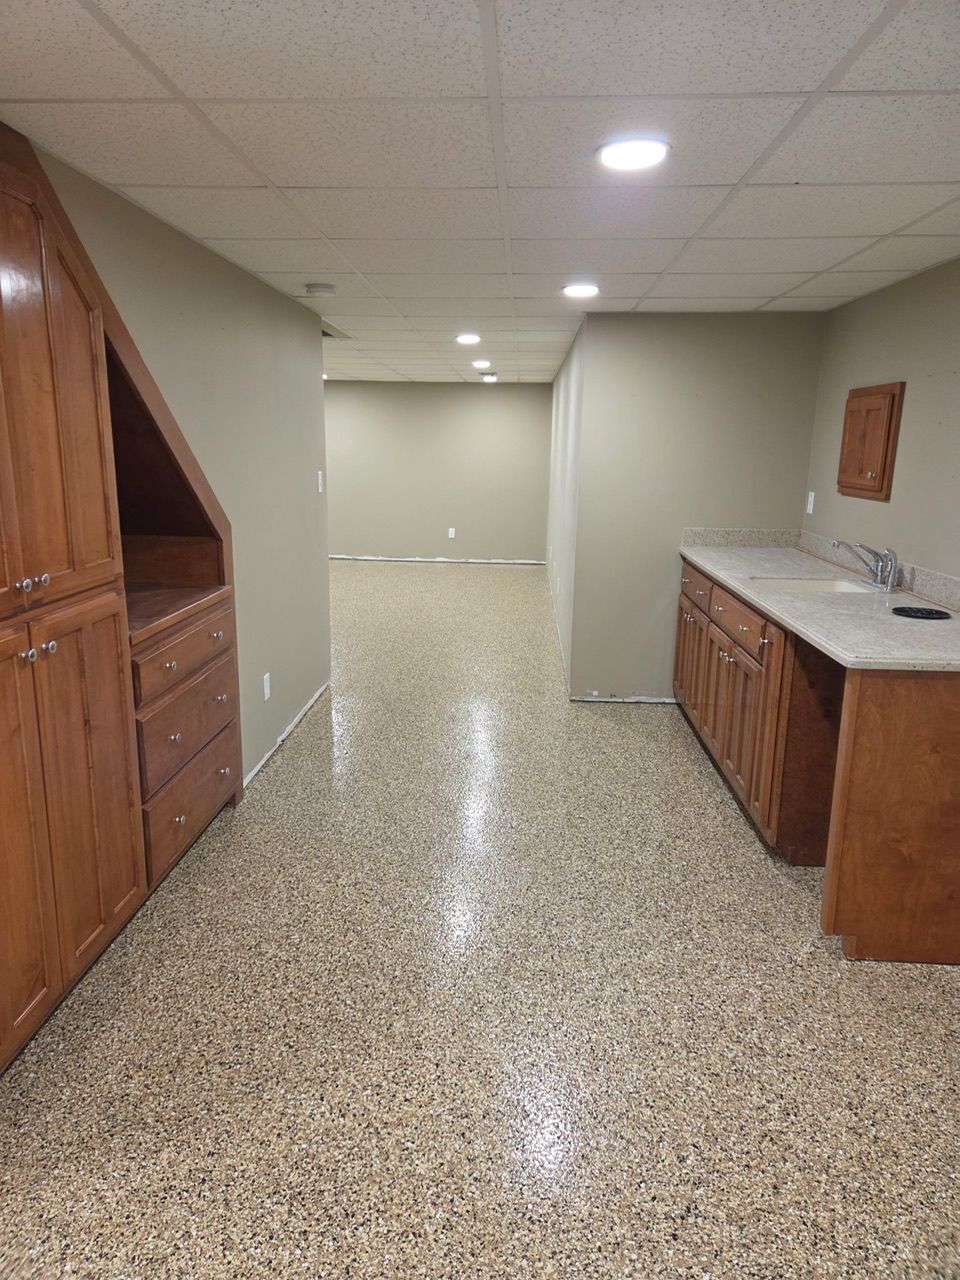
Transform Your Concrete Floors with PolyMagic’s Professional Epoxy Coating Services
Show More